When it comes to reliable power solutions, having a well-crafted generator cable is essential. But what if you could build one yourself, tailored specifically to your needs? Customizing your own generator cable can be an empowering and cost-effective project. In this blog post, inspired by the video "The BEST Generator Cord... made by you," we’ll take you through the reasons for building your own cable, the materials you’ll need, and essential tips for the best results. Let’s get started!
Why Build Your Own Generator Cable?
Building your own generator cable offers numerous advantages over purchasing a pre-made one. The biggest benefit? Complete customization. When you make your own cable, you can:
- Choose the Perfect Length: Whether you need a short cable for indoor use or a longer one for outdoor applications, you’re in control.
- Pick Your Materials: You get to choose the right wire gauge, connector types, and cable jacket, ensuring high performance and durability.
- Ensure Safety and Quality: By using high-quality components, you can create a cable that meets your exact power needs and lasts for years, saving you time and money in the long run.
Not only does this DIY project allow for personalization, but it also provides peace of mind knowing you’re using top-quality materials that suit your unique setup.
Materials You’ll Need
Before you get started, you’ll need to gather some essential materials and tools:
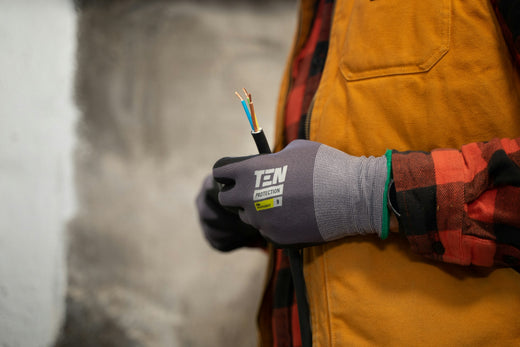
- Cable – You have several options to choose from, including SOOW, PVC, SJTW, STOW, and STW. The cable’s wire gauge is crucial, as it determines how much current it can handle. We’ll discuss the differences and how to select the right one below.
- Connectors – You’ll need one male and one female connector, such as a NEMA 1450P (male) and a NEMA 620R (female). It’s important to avoid double-ended male connectors, which can be extremely dangerous and even deadly.
- Tools – Basic tools like a screwdriver or drill, wire strippers, and high-quality cable cutters will help you with assembly.
Choosing the Right Connectors
Now that you’ve decided to build your own cable, selecting the right connectors is key. Let’s use an example: say you’re setting up a woodworking project in your garage, which is equipped with a NEMA 1450 outlet, but your power saw only requires a NEMA 620 plug (rated for 20 amps). You would need a NEMA 1450 male plug and a NEMA 620 female connector to match your equipment's power needs.
When selecting connectors, you should also consider the space where the cord will be used. Some plugs, like the NEMA 1450, come in an elbow design, reducing stress on the cable and fitting snugly against walls. ACWORKS offers a wide variety of connectors, including straight and rotating designs, so you can choose the one that best fits your setup.
Selecting the Cable Type and Jacket
Choosing the right cable type is essential for both safety and performance. The thickness, or wire gauge, of your cable determines how much current it can handle. For example, if your tool requires 20 amps, you’ll need a 12-gauge wire. If your cord is longer than 50 feet, you might want to consider upgrading to a 10-gauge wire to prevent voltage drop over long distances.

Think of it like water pressure in a hose: the longer the hose, the less pressure you’ll have at the end. Similarly, with longer cables, power consistency drops, which can affect the performance of your equipment.
Now, onto cable jackets. The most common options are:
- SOOW Cable – Highly durable, flexible, and resistant to oil, weather, and water. This is an excellent choice if you need a tough, long-lasting cable.
- STW Cable – A more budget-friendly option with decent flexibility and durability. It’s made of PVC and also has a 600-volt rating, like SOOW.

Selecting the right cable and jacket ensures your cable can withstand the demands of your environment and provide reliable power for years to come.
Cable Assembly – Understanding the Wiring
Now that you’ve gathered your materials, it’s time to understand how to properly assemble your generator cable. The connectors will typically have 3 or 4 prongs:
- G for Ground: The green wire connects here.
- W for Neutral: The white wire goes in this slot.
- X and Y for the Hot Wires: The red and black wires handle the two hot connections.
When connecting wires to prongs, it’s important to match them correctly, strip the wires carefully, and crimp them securely to avoid fraying. Once you’ve connected the wires, secure them with a shell or tightening screw.
If you’re new to wiring, take your time and ensure every connection is secure. Remember, safety first!
Testing and Final Checks
Once your cable is fully assembled, the final step is to test it using a multimeter. This ensures that all connections are working properly and that the cable is safe to use. Skipping this step could lead to malfunctions, or worse, electrical hazards.
Double-check every connection, and once you’re confident that your cable is working as intended, you’re all set!
Conclusion
Building your own generator cable isn’t just a rewarding DIY project—it’s also a practical way to ensure you have the perfect power solution for your needs. By choosing the right materials and following proper safety protocols, you can create a cable that lasts for years and offers reliable performance.
If you found this guide helpful, don’t forget to check out ACWORKS for high-quality connectors, cables, and other essential components for your DIY power projects. Thanks for reading, and stay powered up!
Share:
30 Amp vs 50 Amp EP Kits: Which One Is Right for Your Emergency Power Needs?
What It Means to Have an AC Power Solution That WORKS